Selecting and calibrating the type of eye control
- Choose Extra > Eye tracking > Selection. Note: If Eye tracking does not appear, check that the plug-in has been activated.
- From the Type: drop-down list, select the type of eye control. If no type of eye control is included on the list, the eye control software is not installed or the eye control software is not up to date.
- Click Calibrate. The Calibration settings dialog appears. Some calibration settings need to be specified by experimenting.
- Complete the fields below:
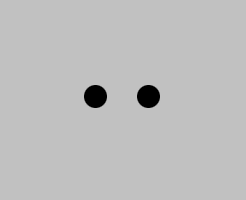
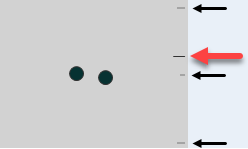
Field Explanation Eyes to track Choose which eye is to be tracked. The default Left and/or right eye option is recommended. For users with an abnormality in 1 eye, an eye patch or any other issue, choose the best possible option from the list. Number of points: Choose the number of dots you want to use to calibrate. The position of the dots will appear in the adjacent image. Calibration area: Users who have difficulty with the size of the calibration area, can reduce the calibration area to 50%. This option is only available for Tobii and Eyetech. Point speed: Choose the calibration speed. The speed needs to be determined by experimenting, and depends on the user. Point size: Choose the size of the calibration dots. Point colors: Click to choose a color for displaying the calibration dots. Use image: Select this option and select an image. The dots are replaced by the selected image. Tip: use an animation if the user has difficulty focusing. Automatic calibration Select this option for a fully automatic calibration. For a calibration that is not automatic, you will need to confirm to go to each next calibration dot. This can be done by pressing a button, clicking the left mouse button or touching the touch screen. Random calibration points Select this option if you want the calibration dots to appear randomly. With a fixed order, users are sometimes too quick to look at the next calibration dot, and as a result the calibration is not completed correctly. Camera images This option is only available for Eyetech. This option displays the camera images of the eyes, instead of the 2 full black circles. The image appears in the picture above this option. - Adjust the position of the eye control and/or the user, so that the eyes appear in the middle of the gray screen.
- Select the Show distance option (only in Tobii). Guides appear on the right side of the gray screen. Adjust the position of the eye control and/or user, so that the dash (1) is as close as possible to the center guide.
- Click Calibrate. Calibration is started. The user looks at the first calibration dot and continues with the calibration procedure until completed.
- If you are working with:
- Tobii, Eyetech or MyGaze: go to the next step.
- a different type of eye control: go to the last page.
- After the calibration, one of the following results appears:
Background Explanation Green The calibration was successful. Eye control will work accurately. Amber Calibration can be improved. Eye control can be used but will be less accurate in some areas on the screen. These areas can be improved. See the next step. Red Calibration was not successful. Improving or re-calibrating eye control is recommended. - Choose one of the following options:
Option Explanation Recalibrate or F3 Choose this option if there are too many poorly calibrated dots. This option restarts the calibration process and all dots must be re-calibrated. Go back to step 3.
Improve or F4 Choose this option if you do not want to perform a full re-calibration. This option allows you to calibrate one or more dots individually. When choosing this option, the background color dispersal and each dot receives an individual color (green, orange or red). Choose a dot that you want to re-calibrate by clicking on the dot. The dot is readied for the user to focus on. The re-calibration of the dot is started by pressing a button, a mouse click or by tapping on the screen. The re-calibration of the selected dot can affect the calibration of the other dots. In Tobii and Eyetech, the best calibration result is always saved. In MyGaze, the last calibration result is saved. Go back to step 3.
Accept or F5 Choose this option if the calibration is good (preferably green background) or if the calibration is acceptable and any improvement is difficult. Eye control can be used immediately. Go to the next step.
Tip: The calibration can be canceled at any time by pressing ESC. If there was a previous calibration, the previous calibration is used. - Use eye control.